7 Tips for Getting the Best Photos on a RWND Camera
- RWND

- 3 days ago
- 3 min read
Updated: 3 days ago

1. Use Flash In Every Photo
The number one mistake people make with disposable cameras is not using the flash. The flash is what creates that classic disposable camera look:
Bright subjects
Dark backgrounds
Sharp faces
Nostalgic late-night energy
Without flash, photos can come back dark, blurry, or difficult to see (See Flash Comparison Below).

2. Stay Around 4–10 Feet Away
Disposable cameras work best when your subject is relatively close.
The sweet spot is usually:
About 4 to 10 feet away
Too close and the flash can overexpose the photo. Too far away and the flash won’t reach your subject.
If you want those sharp, classic flash photos, stay close to the action.
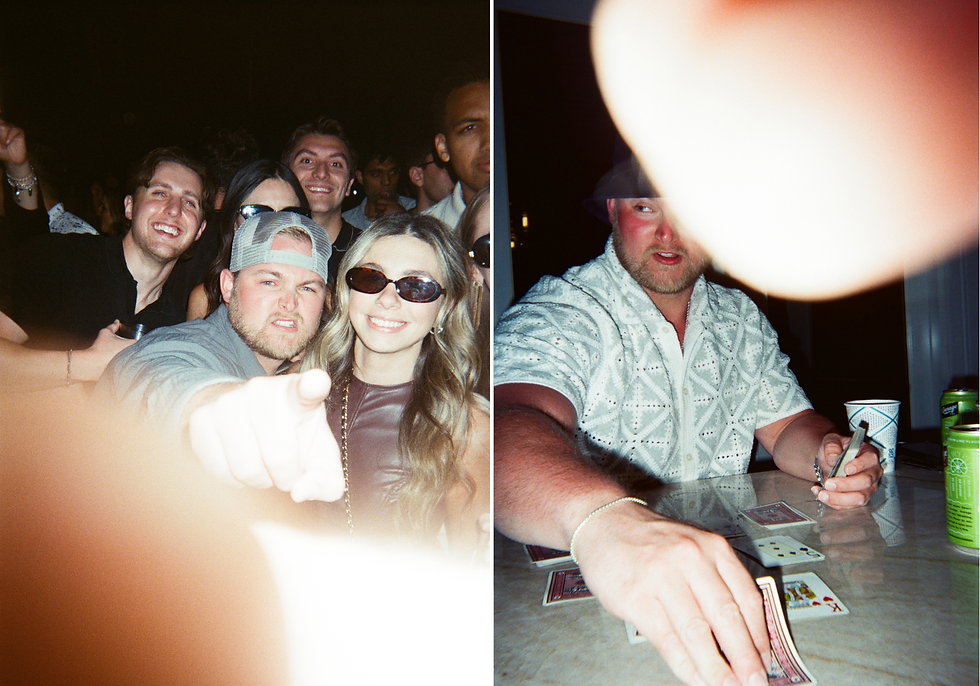
3. Keep Your Finger Away From the Lens
It sounds obvious, but it happens constantly, especially after a few drinks. Getting your finger over the lens on a disposable camera is a very common mistake. Since the small viewfinder window sits above the lens, you can perfectly frame your subject without realizing your finger is covering the actual picture-taking lens below.
Before taking a shot, quickly check that your fingers aren’t blocking:
The lens
The flash
The viewfinder
It only takes a second, but it can save you from unwanted blurs in your photos. However, if a finger sneaks into one or two shots, that’s part of the fun of film anyway.
4. Hold The Camera Steady
Disposable film cameras capture photos differently than your smartphone. Since film needs a little more time to properly expose an image, movement while taking the photo can create blur, especially indoors or in lower light.
To help keep your photos sharp:
Hold the camera with both hands
Tuck your arms slightly into your body
Or gently press the camera against your face for stability
A steady shot can make a huge difference, especially for nighttime photos, indoor events, and candid moments with flash.
5. Protect Your Film While Traveling
If you’re flying with your RWND camera, keep it in your carry-on and ask TSA for a hand inspection whenever possible. Repeated scanner exposure can affect film over time, especially during multi-flight trips. Protecting the film means protecting the memories on it.
Sometimes the effects are subtle. Other times they’re noticeable immediately after development:
Hazy images
Cloudy streaks
Muted colors
Heavy grain
Faded nighttime photos
Loss of sharpness
6. Develop Your Film At A Reputable Film Lab
Where you develop your film matters just as much as how you shoot it.
For the best results, we recommend sending your RWND camera to a reputable mail-in film lab or bringing it to a trusted local film lab instead of using big-box pharmacies like Walgreens or CVS.
Dedicated film labs typically provide:
Higher-quality scans
Better color accuracy
Sharper images
Proper film handling
More consistent results
Many pharmacy locations now outsource film processing, and in some cases, negatives may not even be returned. Since disposable cameras capture moments you can’t recreate, it’s worth choosing a lab that specializes in film photography and treats your memories with care.
7. Bring The Camera Everywhere
One of the best things about a RWND camera is that you can take it almost anywhere, since it fits easily into a pocket of purse.
Unlike carrying around an expensive camera, a disposable camera feels easy and low-pressure. You’re not constantly protecting thousands of dollars of gear, and if the camera gets sandy at the beach, dropped at a concert, or tossed into a bag during a trip, that’s part of the experience.
Because of that, people naturally bring disposable cameras into more real moments, crowded bars, ski lifts, beach days, weddings, road trips, concerts, sporting events, and all the little moments in between. And that’s where film shines.
At RWND, we believe these few simple tips can make your film photos way better as you learn to put down your phone, and pick up the moment.


